Increase your talents and learn tips and tricks! Comment below on your own tips and tricks.
1. Decorating
2. Makeup
3. Organizing
4. Cleaning
5. How To Fold a Fitted Sheet
5. How To Fold a Fitted Sheet
5. Fashion
6. Cooking
7. Flower Arranging
8. Modeling
8. Modeling
9. Dancing
10. Staying Fit and Healthy
11. Crocheting
12. Drawing
13. Teaching Your Children
12. Drawing
13. Teaching Your Children
DECORATING
My mother is a 13 times Parade of Home Winner and owns her own Design Store in Colorado Springs, CO called All About Home. Growing up with a mother who is so VERY talented and taught me all I know, I have picked up some decorating talent myself. Though it will never compare to her, I thank her for inspiring me in my own life. Below are some pictures of my home along with a couple pieces of decorating advice you can use as you turn your house into a home.


Paint makes such a difference. When painting your house choose 3 colors and a Neutral to flow through your home. Kids rooms are the exception. Get a decorators advice before picking a color. It might look good on a small square but when you put it up on the wall it looks completely different. A mistake you do not want to make!
Light is crucial! Make sure you have 4-5 sources of light in each room. All windows in a room only count as 1! Candles DO NOT count! Make sure your lamps are not shorter than 30". Preferably 32" or higher. Dont do dark shades or torchiere lamps.
When you place your furniture make sure people aren't able to walk through your conversations when you sit down.
Hang pictures at eye level of someone 5' 4" - 5' 6"
When hanging it over a couch its usually 6-10 inches above the couch.
Window Treatments hang as high as possible and valences should go high too so the bottom covers the stack back of your blinds.
Scale is a problem a lot of people have. Do not buy things small! No knick knacks or tiny accessories it does not do justice for a room. GO BIG! No more tiny pictures. If you look at my house my pictures are large and are scaled right for each room. Target may be great for somethings but NOT decorating accessories! Some favorite stores for accessories include Home Goods, Hobby Lobby, Marshalls, American Furniture Warehouse.
Putting things on an angle is outdated. Stop trying to angle everything.
Don't line things up on a wall!
If you look at my kitchen counters you will see i don't have any appliances lined up around the counter. No one wants to see your appliances! Put them away!
Neutral colors are timeless. When buying furniture make sure its timeless, cause certain colors will be outdated in a few years. Instead you can pop color using pillows and accessories! Rugs and pictures are also great way to bring in color!
For the room to feel the biggest the couch should be on the largest wall.
White trim makes paint color have more impact.
Makeup
I love to do makeup and you should too! Below are some pictures of different colors i have done and how to apply makeup! Take sometime today to really spend time on your makeup and look beautiful! Surprise your husband! The videos are very helpful and come from my favorite makeup artists!


Rainbow
Before I apply makeup I cleanse my face, apply sunblock (day solution), and Moisturizer. Its important to prep your face because the makeup will go on a lot smoother and nicer. To prep my skin I use the Mary Kay Timewise Set. It was given the Good Housekeeping Seal of Approval and works great!
Next I apply the Eye Primer. This will allow your eye colors to stay on longer and go on smoother.
I usually start with my eyes before doing my face. To start off, start by putting a neutral color all over the eye on the lid, on the inner corner of the eye and slightly under the inner part of the eye, up to the brow and stop at the end of the brow.
Next I choose three colors that go together or 3 different shades of one color. If you want you can use one shade to start off. I start on the outer corner of the eye and make a sideways V from the outer bottom lashline to the middle to 2/3 of the way in from the outer corner of the crease. Also apply this darker color on the lower 2/3 of your bottom lashes starting from the outer corner.
I apply a medium shade to the middle of my eye from the lashline to the crease and then a lighter shade in the inner corner of the eye blending into the medium shade.
It is so important to blend well! Get close to the mirror to make sure you dont have any smudges and that everything gradually blends from one color to the next.
I then apply eyeliner as close to the lashes as possible and SLIGHTLY make it a little thicker toward the middle into the outer corner of the eye. Make sure your line is smooth and consistent.
Next I curl my top lashes and apply black mascara starting at the root and wiggling it outward, upward, and then inward. Dont stop at one coat. Make sure you have applied enough so people can actually tell you have mascara on. I constantly see people hurry to put there mascara on when you really should take your time. Let your lashes dry before putting on a second coat.
Next I brush my eyebrows and then define my eyebrows with an eyebrow pencil. I finish it off with brow gel! Brow gel is one of my favorite products. It keeps your eyebrows in place.
Now that your eyebrows are done we can move onto your face. First i apply concealer to any blemishes or imperfections and also under the eye. BLEND well!
Next apply your foundation all over your face and neck. Dont stop at your face because alot of the time we can tell well your makeup begins and stops. Your foundation should blend well into your face so you cant tell you have foundation on. It should just look like you have a naturally beautiful face.
Next I apply bronzer lightly from my temples down the bottom of my cheekbones, on the outer corners of my forehead, on the sides of my nose and the outer upper part of my neck. Start off with a really light coat. Its easier to apply more as needed.
Next i apply blush from the temples and on cheekbones.
Then i apply a highlighter on the outer "owl" parts of my eye, on the middle of my forehead, down the rim of your nose, and a little on the chin.
ALL DONE! Once you practice you'll be able to do it without thinking. Its not as easy to type how to do your makeup as it is to show you. If you ever want your makeup done I would love to show you how and do your makeup for you!
Here are some of my favorite tutorial makeup videos! Check them out and learn some new tips!
Organizing
My favorite thing to do is organize! I love when everything is clean and has a place of its own. It can be overwhelming at first, but if you do it right its so much easier and will look the best! Below are some pictures of rooms I have organized and some of my favorite tools I use to organize.

pots and pan holder

Jewelry Organizer

stuffed animal tree

pottery barn bookcase

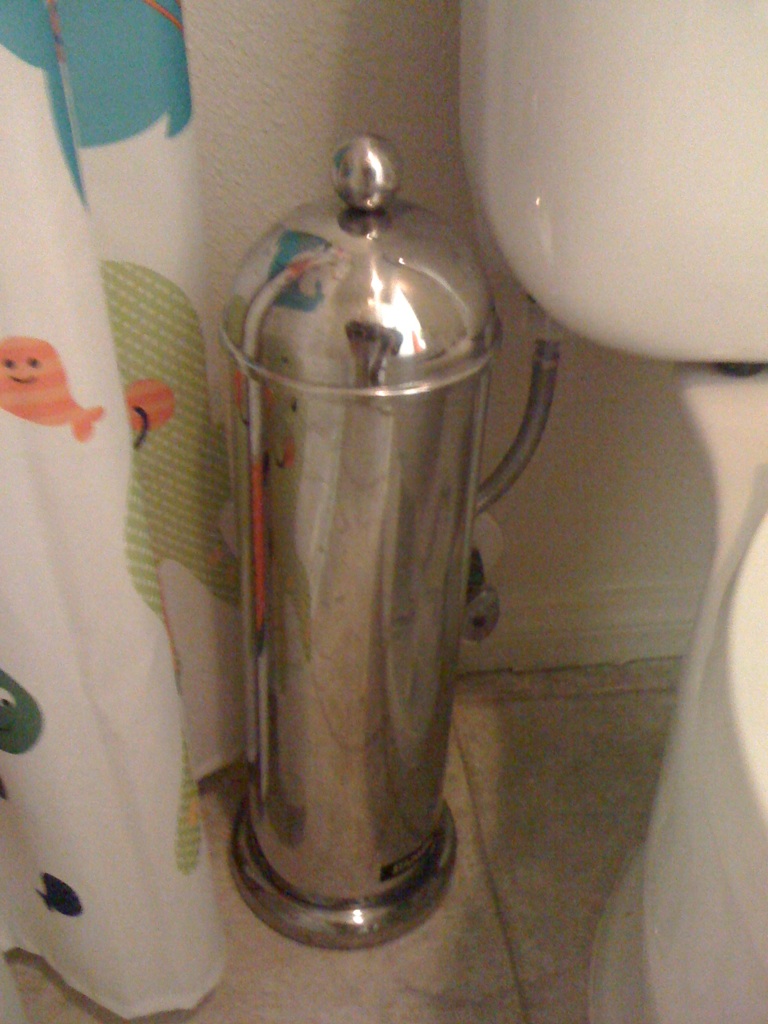
toilet paper holder

remote control holder


utensil/spoon rest
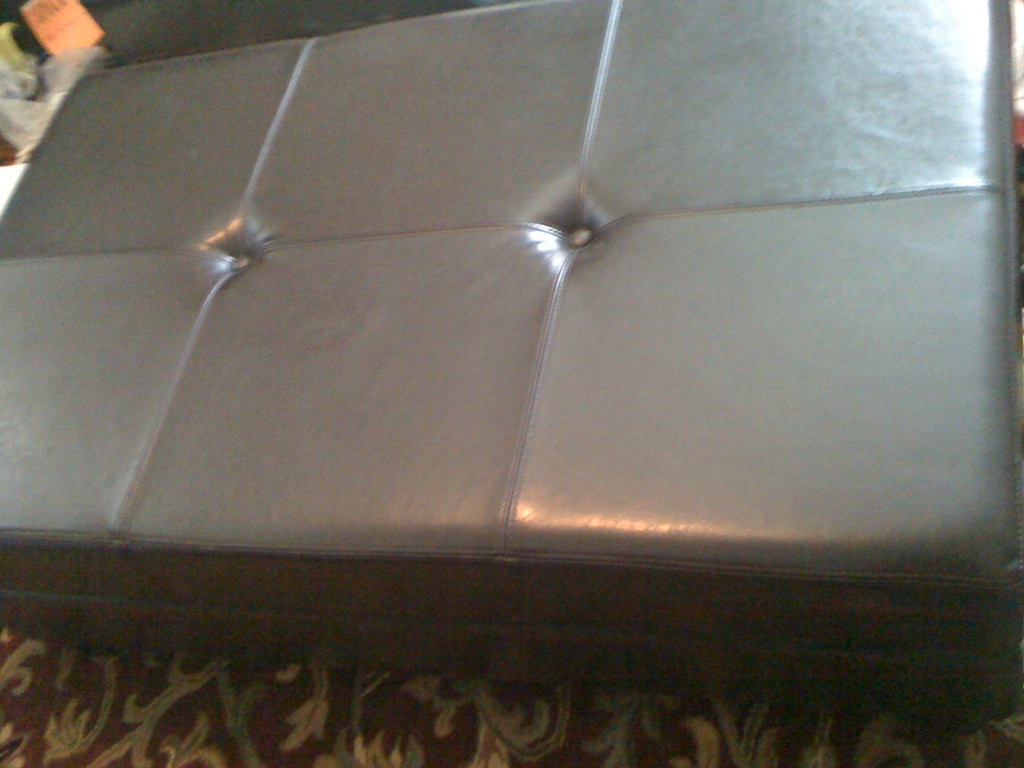
storage ottoman

How to Organize Your Closet
How To Organize Your Office
Organizing Tips
Top 10 Tips
1.Edit: How many pots and pans actually fit on your stove at the same time?
How many clear vases can be filled with flowers at one time?
How many shirts do you need to save for your next paint job?
2.Be Honest: about what you need to keep. What do you NEED to survive/accomplish a goal?
3. One in-one out: When getting something new, get rid of something old.
4. Keep only what you use and love
5. Buy white: buy white storage containers, hangers, boxes, etc… to keep it clean and fresh. You don’t want to draw attention to the boring day to day stuff we all need.
6. Group and combine like items together. Blankets with blankets, pencils with pencils, combine:(ex: if you have 2 half empty bottles of shampoo, combine them together).
7. Organize one room at a time. Make a list of organizing projects for each room. Plan for what organizing items you need for each organizing project. Look for multi-functional items, furniture, storage, that blends in with the surroundings.
8. Establish a limit: (20) grocery bags, spatulas, pants, shirts, bibs, etc.
9. Make time to organize: 5-15 minutes a day or 2, 30 minute sessions a week. Set a timer.
10: Pick up as you go. Live by the Mantra if you throw it down, pick it up; if you open it, close it; if you take it out, put it back.
1. Basket Method: Get 4 baskets/boxes and a trash bag. As you take stuff out, sort it into five piles, throw away, donate, another room, keep, sell.
2. 6 Round Method: There are 5 main categories that create clutter in everyone’s home: trash, dishes, laundry, mail, toys, and your own items. Go around and pick up all the trash first, then pick up all the laundry…etc
3. Timed Method: Set a timer for how long you will organize for. Do 5-15 minute sessions daily or 2, 30 minute sessions a week.
4. Choose a number between 1-100. Mine is 25. Now pick up (25) things and put them where they belong. It doesn’t matter what items, just pick up the first (25) you see.
5. Use the two pass approach: When organizing your home, start by gathering things and getting them to the room where they belong. In the second pass, organize the contents into each room.
6. Get help. Find an organizing buddy or hire help.
7. Get organized while you watch TV. Pull out a drawer and organize it.
8. Household Rules keep it clean and organized. Create some household rules you can all agree and abide to.
Where to Start
1. Remember: Some progress is better than no progress. Even if you only put 1 item away, that’s still one item that wasn’t there before and your room has 1 less item lying around.
2. Tackle one room at a time. Organize that room one shelf, one drawer at a time.
3. Make a list of organizing projects in each room.
4. Make a goal and put it in writing.
5. Keep the end in sight. Imagine how beautiful and clean your room will look when it is organized.
6. Start with countertops or any visible surface. You do not want to start organizing inside drawers and countertops if the rest of the room is a mess. That will just create more mess. Clean the room first, before opening anything to get organized.
7. Take everything out and group like items.
8. Put back only what you use and love.
9. Familiarize yourself with organizing solutions.
What To Get Rid Of
The most important part of organizing is eliminating. Simplify your life.
*What useful purpose does this serve in my life?
*Do I need it for legal or tax purposes?
*Would it be difficult to get another if I needed it someday?
*Make a perfect home sheet. What do you want for this room? List everything that would make that room perfect and design it. Is there room for it? Does it belong?
*Be honest about what you need to keep.
*Establish limits on things. (20) grocery bags. Set a limit before you see how much you have and honestly think about how many you REALLY need.
*Is it expired? Outdated? What is the life expectancy?
*Thing you do not use or love
*Don’t keep memorabilia in storage. Display or use it. If it’s a large item, take a picture and let go of the physical item.
*Things without a home.
*Get rid of shower stuff you haven’t used in a month
*Anything unfinished or need of repair.
*Can you live without it?
*Be selectively sentimental. Keep a keepsake box.
*Take a photo of your child with favorite artwork. Let go of physical.
*Use it or lose it. Is it beautiful and useful?
*Create an umbrella rule. Will you be ok to let go of it if you haven’t used it in 3 months? 6 months? 1 year?
*Learn to part with things. Will I survive if I get rid of this?
*If it takes you longer than 60 seconds to decide
*If you plan to fix something, give yourself a deadline.
*Toss promotional or freebie items.
*One-in,one out. When one catalog comes in, another goes out.
*Don’t buy things that take up lots of room or barely use.
*Is it covered in dust?
*When you decide to get rid of stuff, get it out of your house as quickly as possible.
*Pretend you are moving. Is it worth packing, unpacking?
*We tend to hold on to things, because we paid “good money” for them. What is the value of something we don’t use? Zero. That dress/suit you keep in your closet, could help someone get a job and earn 40,000 a year.
*Think of it as recycling. Giving it to someone who needs it and will use it more than you.
*When you have tons of one item and you can’t narrow it down, get a new one that will replace all of them.
*Have someone else hold objects. When you hold something it increases your attachment.
*Play dress up with your clothes. Try everything on, if it doesn’t fit, needs to be fixed, has holes or wear and tear, let it go. If you are holding onto clothes that you think you will fit in someday, get rid of them. When you do finally lose the weight, you can reward yourself with new clothes.
*If it’s not your clutter, it’s not your responsibility.
*If you are saving something because you might need it someday, ask yourself “could I get another one pretty easily and inexpensively if I needed to?
*If you cannot easily access it, you will never use it. Don’t store stuff in storage, up high where you cant reach, behind other boxes/bins.
*If you are not taking care of it properly or throwing it around, you shouldn’t keep it cause its not worth that much to you. Only store what you use and love.
*Look at warranty for boxes. Does the warranty expire in 90 days? If its passed the expiration date you don’t need to keep the box anymore.
*Don’t keep items just because they are good or new. Remember to establish a limit on how many you need, how often you use/wear it, do you love it, is it beautiful.
*Do you have something else that can do the same job?
*When comparing similar things or multiple of 1 item, consider which one would you choose to use right now if you needed to use it/wear it.
Getting Motivated
*Decide what your reward will be for completing an organizing project.
*Get the family involved. Then reward everyone by doing a fun family activity.
*Set a garage sale date.
*Play the clean up game.
*Listen to upbeat music while you clean.
*Host a party
*Compromise. If I complete this task then I can…
*Tell someone.
*Pamper yourself with a spa day when you complete your project.
*Mark an X for every day you do 5 minutes of organizing. Reward yourself for organizing if you got X every day of the week/month.
*Do it in the moment. Lower your to do list by doing it while you are thinking about it.
*Deal with spills immediately
*Organize as you put things away
*Give yourself a daily organizing reward
*Use self-discipline
*Give yourself a deadline. Invite guests over, party, dinner…
*Clean up today’s mess first
*Im only going to pick up 10 things…then pick up 10 things total or 10 things in each room. The hardest part is getting started, if you keep saying im only going to pick up 10 more things, you will soon have the entire room/rooms clean and organized.
*Think of your home as a model home. They don’t have boxes and bins out everywhere. It’s nicely decorated. Don’t leave things out in the open, lined up on counters, stashing items in corners, etc. Organizing is mostly done behind closed doors.
*Give organizing your full attention. Turn off computer and cell phone/maybe TV
*When buying organizing items, shop around first for best deal, but don’t buy crappy organization. Buy right the first time. If it’s worth keeping, its worth taking care of. Be creative UNTIL you can afford it.
*Just cause it’s there now, doesn’t mean you have to keep it there. Put items where they are used.
*When stacking things side by side, go largest to smallest or vice versa.
*Eliminate excess wrapping, boxes, etc. (ex: if you have bulk toilet paper still in the wrapping, you can take it out of the plastic and either store them or stack them)
*Use online to store important papers, documents, phone numbers, but save them to a disc,hard drive for back up.
*Borrow items you only use once a year or only on occasion. You can borrow big ticket items at bagborrowsteal.com; borrowedbling.com; renttherunway.com; onenightaffair.com; lowes/homedepot
*To see how much something is worth you can use the collectables price guide. Go to www.satruck.org/valuableguide.aspx.
*Keep in mind it can take awhile to sell something, so if you have a lot to sell, choose only big ticket items $20+. Everything else list it on a paper and add it to your receipt they give you when you donate it and you can write it off on your tax return.
*Organize papers in a binder
*If you put something down and plan to come back to it later, put it away. That’s how clutter is created is because we leave things out thinking we will get to them soon. Before you go do something else, clean up what you are doing now, first.
*If you are waiting to do it perfectly or wait for the perfect time, it will never happen. How does something become perfect? Practice! You will never be completely organized cause its always an ongoing process. As soon as you get today’s mail done, tomorrow’s mail is on the way. Don’t wait for the ideal time to begin something. There is only today, do what you can today with what you have, while you are here. You may not be here tomorrow. If something where to happen to you, do you want people to go through your stuff you really don’t want them to see, or see your messy lifestyle that they now have to clean up?
* Don’t take home items just because they are on sale or free. Do you really need or use it? Do you already have it? The cheaper something is, the more likely you are of not taking good care of it. If it’s easy to get, it’s easy to dispose of. Buy stuff that you will want to take good care of. Buy one and done. (Buy right the first time and you won’t have to buy it again. Buy it cheap the first time, you will have to buy another in the future equaling the same amount that you would have paid if you got it right the first time)
*Live within your budget. If it is worth having, it’s worth working for.
*Have a list of what you need to buy at a store so you don’t buy anything you don’t need. Don’t impulse buy. Walk quickly through aisles, and if you see something you like that was not on your list, take a picture of it to remind you and you can go home and think about it. Give it at least 3 days to a week and if you still want it and you have the money for it then go ahead.
*Create a Life Organizer (on my blog www.pendletonmoms.blogspot.com)
*If you have 2 of the same item, place the opened item in front and use that first.
It can get overwhelming so start off just pick up the first ten things. There is no where special to start, you just need to start.
The key to having a well kept and organized home is by having just what you absolutely need. Don't try to make room for something you only use once a year or once in a lifetime. Eliminate the clutter. Get rid of what you don't need, haven't used in the last three-6 months, anything broken, outdated, clothes you dont fit into, things that you say you will use but end up never using. Take in mind when you eliminate, say "if i had the choice to choose between this (clothes, appliance, etc.) and this, i will always choose this one even though they may be both nice. Just keep the one you use. Dont keep something because its nice. If you dont use it, get rid of it.
Buy things that serve a multi-purpose. As you see in my pictures, the utensil holder also has a removable spoon rest. You will save space by getting multi-functional tools. The ottoman serves as an ottoman and toy chest but its something you would have never thought would hold all these toys. The decorative box looks like a decoration but it opens up as a remote control holder. The toilet paper holder nicely organizes your toilet paper and keeps it hidden and decorative. Buy furniture that has organization on it.
Your closet should have plastic white hangers. Make sure they all match. No wire hangers! You will see the difference. When you take a shirt of a hanger have another designated spot where you keep all your empty hangers so you dont have empty hangers sticking out between your clothes.
Just because you have had that vase on your top shelf in your closet doesnt mean that it has to stay there or even belong there. Keep things where you use them most. Your closet is meant for clothes, shoes, accessories, not storing other items. Laundry room is a Laundry Room, a Kitchen is a kitchen, keep things where they belong.
There should be a place for everything in your home. Think of a model home. They dont have things lying about or stuck in corners. Make it so your items are stored away where others cant see them. No one wants to see your junk.
Dont buy anything unless it can be stored away nicely. Dont impulse buy. Research. Keep things that you use on a regular bases. Constantly go through your stuff and eliminate. Think "Will i die if i get rid of this? Is my life going to end? Do I really need this? Is it something I can replace?"
Get stuff that matches and fits into each other. Instead of having a million different types of tubberware or different mixing bowls, get ones that stack inside of each other. Big ones on bottom, smaller items on the top.
Put like things together. You dont need blankets on all floors. Put all your blankets in one spot. You dont need mixing bowls in each cabinet. Put them all together in one cabinet. Put all your books in one spot. Think of things that you have that are in different parts of the house. All the same type of item goes together.
Cleaning
Cleaning is actually really easy, we just make it harder than it needs to be. If you want an easy job seem hard, just keep putting off doing it. If you keep your house organized its easy to keep your house clean. Just a few tips on cleaning.
To get started just say your only going to pick up ten things and then pick up 10 items whatever items you pick up first. It doesnt matter where you start, it just matters that you start. Whenever you dont feel like cleaning or dont know where to start, always use that rule! Starting is the hardest part.
If your cleaning a room or house just start in one room or one section of the room. There are five main things that keep our house dirty: trash, laundry, dishes, bedroom, and toys (kids or our own). Separate your chores into those basics and do one basic at a time.
Get the kids involved in chores and have age appropriate chores for them to do.
A great app i have for my iphone is the Home Routine. You can make morning, evening, weekly tasks, kids schedules and more and check items as you get them done. it also gives you zones to work on each week to deep clean. You can customize it however you want.
Main cleaning chores include, vacuuming, dusting, sweeping, mop, wipe down counters, clean toilets, clean mirrors, clean bathrooms.
Put things away after you use it. Its easier when you clean up as you go. Dont leave something for tomorrow that you can do today.
How to Keep Your Children's Playroom Clean
How To Fold A Fitted Sheet
Fashion
Keep up with the latest fashion. Sweats, messy pony tail, baggy shirts are not in! Just cause your a mom doesnt mean you have to dress like one. Go through a Glamour or Lucky Magazine and find an outfit or picture you like and copy that picture with items you already have in your closet!
70’s Sensation. The 1970’s aesthetic is making a huge comeback, from understatedly feathered hair to high-waisted jeans. Bohemian elements can be seen in many designer spring collections. For pieces that won’t break the bank, check out Nicole Richie’s “House of Harlow” line. The brand recently added sunglasses to its funky collection. Think flowy print dresses, flair pants, and faux-fur pieces and you’ll instantly feel like you just stepped out of Studio 54.
One, two, hut! Military-inspired clothing continues to be in style. Combat boots, skinny cargo pants, and aviator sunglasses are still street fixtures, but you can update the look by swapping the boots for some cute flats or sandals. Ditch the cargo jacket for a cargo vest to take this trend right into spring.
Partial to Prints. Mixing prints is all the rage this season. Stripes and florals, black and blue, spots and neon… anything goes! To keep the outfit from looking totally kooky, keep all pieces within the same color family.
Flat-Out Fashion. Believe it or not, the wedges trend has just become more comfortable! Flat wedges are the perfect counterpoint to the last season’s ladylike pointy heels. Give your feet a break and embrace the best footwear trend in years! A great pick is the Layla Platform Wedge Espadrille from shoe designer Dolce Vita.
Plain and Simple. Neutrals are back in a big way this season. From beige to rust, this relaxed and effortless color palate will make you feel like a sun-kissed desert princess. Nude shoes are instant leg-lengtheners, transcend seasons, and are a great investment piece.
Not Just for “Gleeks.” Rachel Berry’s outrageously preppy attire is inspiring fashionistas everywhere to embrace their nerdy side. Loafers with tassels, pastels, and woven pieces work together to complete the look.
Orange you glad it’s Spring? Orange is the official color for spring 2011. Incorporate just a splash with a small accessory or choose an orange dress or shirt if you’re feeling bold!
Slumber Party. Pajama-inspired trousers and pantsuits were a staple on the spring 2011 runways. Just try not to fall asleep in this amazingly simple trend.
Less is More. Minimalism has been a consistent fad for the past few seasons. Put away those statement necklaces and overwhelming accessories. Smaller, more delicate jewelry is in; chunky necklaces and costume jewelry should be shelved for now.
White-Out. White handbags and accessories just scream “Spring!” This versatile shade goes with everything, so just one handbag – in an all-purpose style – is all you need.
Mixing Metals. When accessorizing you dont need to match gold and gold, and silver with silver, mix them together. Its in!
And as some trends are on the rise, others just need to be tossed.
The following are some trends to get rid of for good:
Jungle Fever. The animal print trend has been overdone for a while and it’s just plain boring now. As the flowers bloom for spring, pick happier, brighter prints to liven up any outfit.
Keep it in the Bedroom. Lingerie-inspired clothing is too promiscuous for daywear – especially in a college environment. Bustiers are not appropriate to wear in public, no matter what you wear with them.
Hey down there! Skyscraper heels may make you feel sexy at first, but once you realize you’re six inches taller than all the guys in the room, the shoes may lose their appeal. Pain is not gain. Fashion is warming up to comfier trends, so why shouldn’t you?
Crop Tops are Not Hot. They tried to make a comeback last season, but belly tops are neither fashionable nor flattering – unless you look like you’re about to strut down Victoria’s Secret runway. Cover your stomach and show more leg or décolletage if you want to look a little more risqué.
School’s Out. High uniform socks never look fashionable – not with heels, flats, or any type of footwear. Save it for high schoolers whose uniforms consist of ties and skirts (huh?!) – oh, and maybe Blair Waldorf.
If you abide by the above fashion manual, you will be set for spring. Embrace the warm weather by slowly incorporating these trends into your daily looks. Feel free to stay within your comfort zone, or take some fashion risks! Either way you do it, remember that confidence is the essential component of any chic outfit, so wear these new spring styles with pride!


Cooking
If your just beginning go to the reluctant gourmet to learn how to cook. I love to cook and bake and it can be fun and easy to do. If you follow the recipe step by step instructions there is no way it can turn out wrong. If you dont know what a term or ingredient is, look it up! Read the ENTIRE recipe before starting. I have some of my favorite recipes on my RECIPE page. You can find more great recipes at Betty Crocker or through southern living, food, and other great magazines. More great recipes at some of my favorite recipes from websites posted on the recipe page! Not sure what to eat? Go to Ideas for Recipes and enter the ingredients you have and it will choose a recipe for you!


Floral Arranging
I used to do floral arrangements for my moms store and would sell them for $350 or so. Its a great way to bring artistic flare into your home. DO NOT buy bleached flowers. If the flower is not normally that color (blue roses, black flowers, feathers, sticks, etc.) do not buy it. Its tacky and looks hideous. I usually go to Hobby Lobby when they have their half off sale and buy artificial flowers, wire cutters, styrofoam blocks or you can use the water ready mix. and Heavy Duty nail glue from Home Depot. Once you have the pot or planter you want to put it in your ready to start! Keep things spacey and airy. And dont do large clumps! Go through catalogs and find floral arrangements you like and use it to inspire you! Lilies are my favorite flower. When i went to market i could buy this floral arrangement for $300 but made it myself with $100!


Modeling
I enjoyed modeling for fun but my favorite part is playing dress up everyday and being a "model" for my husband and myself. You don't need to be in front of a camera. You can be a model everyday by getting ready and being a model for those around you. Its important to get ready and take good care of yourself and motivate others to do the same. Use A, E, I, O U! When modeling, move your lips to vowel letters. Use your eyes to show how you feel. Practice in front of a mirror and see what poses and looks work best for you. Look through magazines and see how the models do and try out different poses and looks.


Dancing
I love to dance and won 3rd place in a dancing competition of over 400 people. Jasmin Meakin is my favorite choreographer. You can learn new moves by picking out some of your favorites and practicing them. You always get better at something by practicing. Here are some of her videos below.
On the Floor by Jennifer Lopez
Allejandro by Lady Gaga
Rude Boy by Rhianna
OMG by Usher
Bad Romance by Lady Gaga
Telephone by Lady Gaga
Do It Like A Dude by Jessie J
California Girls by Katy Perry
Bottoms Up by Trey Songz
ET by Katy Perry
Pony


Staying Fit and Healthy:
Tips on how to lose weight
1. Drink Water. If you cut all your caffiene and sugar drink intake and start drinking water you can lose up to 5 lbs in a week! If your not a water drinker, just try this for a week and see if it works for you. If your not ready to give up caffiene just yet, drink a glass of water in between your glass of caffiene. So if you have a glass of soda, drink a glass of water next before drinking another glass of soda. 40% of women lost more weight by drinking two glasses of water before each meal!
2. Eat off a dessert plate and dont go for seconds. Your stomach is the size of your fist. So to keep yourself from over eating, put your bigger plates up top and your dessert plates down where you can easily access them and eat of a dessert plate. Eat smaller portions. This is not a diet, just instead of getting a foot long at Subway, get a 6 inch. Whatever you normally eat just cut down a little bit. Doesn't mean give up all the tasty stuff!! Just eat less of it.
3. Eat 3 meals a day, and 1-2 healthy snacks in between. If you constantly eat cause you have nothing to do, find something to do and keep yourself busy to keep your mind off food. Dont skip out on meals cause your body will store the fat.
4. Use larger utensils to eat. By using larger utensils you feel like your eating more, whereas if you eat with smaller spoons or forks you tend to eat more cause you feel like your not eating enough.
5. Yellow and red make you want to eat more, so instead eat off of blue plates which make you want to eat less. McDonalds colors are yellow and red which make people tend to eat more. Don't paint your kitchen either of these colors if you are trying to lose weight.
6. Dance! Dancing burns tons of calories and its fun! So turn up the music and while you are doing chores, in between commercials, or during your spare time practice those dance moves!
7. Do mini workout sessions. You can either work out 30 min a day, 3 times a week or do mini workout sessions everyday for 5-10 min. Some workout is better than no workout. Use the excercises off the TIPS AND TRICKS page or make your own. Workout during commercials, when you get up in the morning, during your spare time, at night, etc. Do lunges as you go from one room to the next....run up and down the stairs anytime you need to use them...do simple stretches while cooking food...you can make it apart of your regular routine without taking time out of your day.
8. Go on daily walks. Go on a daily walk with your spouse or family. Its a great bonding experience as well as great exercise.
9. Tighten your abs. You can do this anywhere! Just tighten your abs for 1 min at a time. You can still crunch your abs and breathe in and out.
10. Stay busy and active. Go out with your kids and do something fun, take up a new hobby, and stay busy. Keeping your body busy burns calories. Don't sit around and watch TV or take naps during the day. Instead find something active to do whether its going to the park, hanging out with friends and family, sports, or go have fun. You should be walking atleast 10,000 steps a day. Get a pedometer and track your progress.
11. De-stress. Take time to meditate and use the Stress Management Tips on this blog to help de-stress. It's hard to take care of your body when your overwhelmed. Take care of yourself first so you can help others.
12. When you go grocery shopping, dont grab fatty snacks. I skip the snack aisle and soda aisle. If i want a soda or snack i have to go out and get one, not have it at the house. Look for other healthy snacks to eat.
Tips on how to lose weight
1. Drink Water. If you cut all your caffiene and sugar drink intake and start drinking water you can lose up to 5 lbs in a week! If your not a water drinker, just try this for a week and see if it works for you. If your not ready to give up caffiene just yet, drink a glass of water in between your glass of caffiene. So if you have a glass of soda, drink a glass of water next before drinking another glass of soda. 40% of women lost more weight by drinking two glasses of water before each meal!
2. Eat off a dessert plate and dont go for seconds. Your stomach is the size of your fist. So to keep yourself from over eating, put your bigger plates up top and your dessert plates down where you can easily access them and eat of a dessert plate. Eat smaller portions. This is not a diet, just instead of getting a foot long at Subway, get a 6 inch. Whatever you normally eat just cut down a little bit. Doesn't mean give up all the tasty stuff!! Just eat less of it.
3. Eat 3 meals a day, and 1-2 healthy snacks in between. If you constantly eat cause you have nothing to do, find something to do and keep yourself busy to keep your mind off food. Dont skip out on meals cause your body will store the fat.
Only eat when your hungry and don't eat when your not.
Stop eatting 2-3 hours before you go to bed.
4. Use larger utensils to eat. By using larger utensils you feel like your eating more, whereas if you eat with smaller spoons or forks you tend to eat more cause you feel like your not eating enough.
5. Yellow and red make you want to eat more, so instead eat off of blue plates which make you want to eat less. McDonalds colors are yellow and red which make people tend to eat more. Don't paint your kitchen either of these colors if you are trying to lose weight.
6. Dance! Dancing burns tons of calories and its fun! So turn up the music and while you are doing chores, in between commercials, or during your spare time practice those dance moves!
7. Do mini workout sessions. You can either work out 30 min a day, 3 times a week or do mini workout sessions everyday for 5-10 min. Some workout is better than no workout. Use the excercises off the TIPS AND TRICKS page or make your own. Workout during commercials, when you get up in the morning, during your spare time, at night, etc. Do lunges as you go from one room to the next....run up and down the stairs anytime you need to use them...do simple stretches while cooking food...you can make it apart of your regular routine without taking time out of your day.
8. Go on daily walks. Go on a daily walk with your spouse or family. Its a great bonding experience as well as great exercise.
9. Tighten your abs. You can do this anywhere! Just tighten your abs for 1 min at a time. You can still crunch your abs and breathe in and out.
10. Stay busy and active. Go out with your kids and do something fun, take up a new hobby, and stay busy. Keeping your body busy burns calories. Don't sit around and watch TV or take naps during the day. Instead find something active to do whether its going to the park, hanging out with friends and family, sports, or go have fun. You should be walking atleast 10,000 steps a day. Get a pedometer and track your progress.
11. De-stress. Take time to meditate and use the Stress Management Tips on this blog to help de-stress. It's hard to take care of your body when your overwhelmed. Take care of yourself first so you can help others.
12. When you go grocery shopping, dont grab fatty snacks. I skip the snack aisle and soda aisle. If i want a soda or snack i have to go out and get one, not have it at the house. Look for other healthy snacks to eat.
Fitness at Home
30 Jumping Jacks
5 Push Ups
25 High Knees
7 Burpees
10 Crunches
5 Pushups
7 Squats
30 Jumping Jacks
1 Minute Wall Sit
5 Push Ups
25 High Knees
(Repeat 3-5 times for maximum results)
 V-Up V-Up1) Start position: Lie back onto floor or bench with knees bent and hands extended towards ceiling. Head should be in a neutral position with a space between chin and chest. 2) Leading with the chin and chest towards the ceiling, contract the abdominal and raise shoulders off floor or bench. Also raise legs up towards ceiling and attempt to touch your hands to your feet. 3) Return to start position. Trainer's comments: |
 Full Sit Up Full Sit Up1. Start position: Lie back onto floor or bench with knees bent and hands behind head. Keep elbows back and out of sight. Head should be in a neutral position with a space between chin and chest. 2. Leading with the chin and chest towards the ceiling, contract the abdominal and raise shoulders off floor or bench until you are seated in an upright position. 3. Return to start position. 4. Remember to keep head and back in a neutral position. Hyperextension or flexion of either may cause injury. Trainer's comments: |
 Lumbar Roll Lumbar Roll 1. Lie on your back with your legs in thighs perpendicular to the floor and your knees bent. 2. Keeping your shoulders on the ground slowly rotate your legs to the right until they touch the floor. 3. In a controlling manner bring your legs back up to the starting position. 4. Repeat with the other side. Trainer's comments: |
 Single Leg Plank Raise Single Leg Plank Raise1. Start by forming a straight plank with your forearms and feet as the contact points on the ground. 2. Once the plank is formed raise one foot off the ground and then return to the starting position. 3. Repeat this movement for the desired repetitions alternating back and forth between legs. Trainer's comments: |
 Power boat pose Power boat pose1. Start by sitting on the floor and extending your legs and arms. 2. Lean back keeping your legs straight with your arms extended in front of you. 3. Hold this balanced position maintaining proper positioning for the desired time limit. 4. Rest and repeat for the desired repetitions. Trainer's comments: |
 Alternating Toe Touch Alternating Toe Touch1. Start position: Lie back onto floor or bench with feet up into the air. Head should be in a neutral position with a space between chin and chest. 2. Leading with the chin and chest towards the ceiling, contract the abdominal and raise shoulders off floor or bench. Extend one arm and reach for the opposite foot. Return to start position and repeat with other hand. Remember to keep head and back in a neutral position. Hyperextension or flexion may cause injury. To increase resistance, hold medicine ball in hands. To decrease resistance, position hand closer towards body Trainer's comments: |
 Rollouts with Ab wheel Rollouts with Ab wheel1. Start by sitting on your knees and placing your hands on the ab wheel. 2. Proceed to roll out with the ab wheel until your body is parallel with the floor. 3. Using your arms pull yourself back up to a semi-upright position. 4. Repeat for the suggested repetitions. Trainer's comments: |
 Straight Arm Hold Straight Arm HoldStarting Position: Lie on your side with your right hand on the ground. Lift yourself up to form a plank with your right arm straight and your left arm on your side. Hold this position for the recommended number of reps. Repeat with the other side. Trainer's comments: |
 Oblique Abductor Raise Oblique Abductor Raise1. Start by getting into a lateral plank pose with your hips off the ground. 2. Your only ground contact points should be your feet and elbow. 3. Holding this position raise your outside leg keeping it straight until you reach full range of motion. 4. Return your leg to the starting position and repeat for the desired repetitions. 5. Switch sides and repeat. Trainer's comments: |
 Reverse Crunch Scissor Kicks Reverse Crunch Scissor Kicks1. Start by lying on your back with your legs perpendicular to the floor. 2. Slowly lower one leg until you are no longer able to keep your lower back neutral to the floor. 3. Lift your leg back up and then repeat with the other leg for the desired repetitions. 4. As you get stronger continue to lower your legs closer to the floor as long as you can keep your back neutral with the floor. Trainer's comments: |
 Single Leg Plank Pose Single Leg Plank Pose1. Start by forming a straight plank with your forearms and feet as the contact points on the ground. 2. Once the plank is formed raise one foot off the ground and hold this position for the desired time. 3. Once the time has been met return your foot to the ground and repeat with the other leg. Trainer's comments: |
 Double Crunch Double Crunch1. Lie back onto floor or bench with knees bent and hands behind head. Keep elbows back and out of sight. Head should be in a neutral position with a space between chin and chest. 2. Start position: Hands behind head and knees bent at 90 degrees. 3. Leading with the chin and chest towards the ceiling, contract the abdominals and raise shoulders off floor or bench. During the crunch, also bring knees towards chest. 4. Return to start position. 5. Remember to keep head and back in a neutral position. Hyperextension or flexion of either may cause injury. Trainer's comments: |
 Straight Arm Modified Crunch Straight Arm Modified Crunch1) Start position: Lie back onto floor or bench with knees straight or bent if you prefer, both hands straight and down by waist. Head should be in a neutral position with a space between chin and chest. 2) Leading with the chin and chest towards the ceiling, contract the abdominal and raise shoulders off floor or bench. Extended arm should remain fixed and parallel to head. 3) Return to start position. 4) Remember to keep head and back in a neutral position. Hyperextension or flexion may cause injury. Also only curl your torso until your shoulders blades are off the ground. Do not try to sit up to an upright position. To increase resistance, hold dumbbell in hand of extended arm. To decrease resistance, position hand closer towards body. Trainer's comments: |
 Janda Sit up Janda Sit up1. The performance of this exercise is done by sitting in a normal situp position feet flat on ground but vigorously tightening hamstrings and glutes. 2. This will cause the hip flexors to be inactivated in a process called reciprocal inhibition which basically means that opposite muscles to the contracted ones will relax. 3. As you begin the exercise fill your lungs with air and in a slow three to five second count ascent, slowly exhale. 4. Return to the starting position and repeat. Trainer's comments: |
 Plank Plank 1. Start by placing your forearms on the ground and forming a plank with your forearms and feet. 2. Hold this position keeping your body parallel to the ground for the required time. Trainer's comments: |
 Pushup with rotation Pushup with rotation1. Start by completing a normal pushup and then at the top of the second pushup pick your hand up off the ground and rotate your upper body so that your hand is above your head. 2. Proceed to complete this same movement with the other arm. Then return to a normal pushup. 3. Complete this movement for the desired number of repetitions. 4. To make this more challenging hold a dumbell in each hand while completing this movement. Trainer's comments: |
 Reverse Crunch with hands behind your head Reverse Crunch with hands behind your head1. Start by lying on your back with your hands behind or above your head. 2. Proceed to draw in your belly button toward your spine and lift both legs up at the same time towards your chest. 3. Return to the starting position and repeat making sure that you don't arch your back as you are lowering or raising your legs. Trainer's comments: |
 Single Leg Leg Raise Single Leg Leg Raise1. Start by bending one leg keeping the foot on the ground. 2. Proceed to raise the other leg off the ground in a bent knee position to activate the abs. 3. This is a basic exercise but essential to master before moving on to the next step. 4. Once you have that mastered you can raise your leg keeping it straight and extended. 5. Repeat for the desired repetitions and then repeat with the other leg. Trainer's comments: |
 Straight Leg Obliques Straight Leg ObliquesStarting Position: Lie on your back and raise your legs straight into the air. Rotate your legs keeping them straight to the side and the then return to the starting position. Repeat to the other side. Trainer's comments: |
 Lying Side Crunch Lying Side Crunch1) Lie with back on floor or bench with knees bent. 2) Start position: Let your knees fall to the right so that your hips are somewhat rotated. 3) Leading with the chin and left shoulder, contract abdominal muscles and raise left shoulder off floor or bench towards left knee. 4) Return to start position. Repeat with other side. 5) Remember to keep head and neck in neutral position throughout movement. Do not twist excessively - elbow does not need to touch knee. Trainer's comments: |
 Pushup Bridge Pushup Bridge1. Get on your knees and place hands on the ground. 2. Start position: Align hands at nipple line, place feet hip width apart on toes, and extend the arms to raise body up. Trunk and hips should be in a straight line. 3. Hold for the recommended number of seconds. Trainer's comments: |
 Crunch Crunch1. Start position: Lie back onto floor or bench with knees bent and hands behind head. Keep elbows back and out of sight. Head should be in a neutral position with a space between chin and chest. 2. Leading with the chin and chest towards the ceiling, contract the abdominal and raise shoulders off floor or bench. 3. Return to start position. Remember to keep head and back in a neutral position. Hyperextension or flexion of either may cause injury. Trainer's comments: |
 Superman Superman1) Start position: Lie face down on floor with hands down at sides. You may place a rolled towel under forehead to clear face from floor. 2) Raise chest and head off floor keeping feet in contact with floor. 3) Return to start position. 4) To increase resistance, extend arms and place hands overhead. 5) Do not raise head past 8-12 inches - excessive hyperextension may cause injury. To vary exercise raise feet while raising trunk. Trainer's comments: |
 Scissor Kicks Scissor Kicks1. Lie back onto floor or bench with both knees bent and feet flat. Place hands at sides. 2. Contract abdominal muscles continuously to stabilize trunk (or tuck stomach in by drawing naval in towards spine). Lower back should be in a neutral position. 3. Start position: Straighten both legs so that they are perpendicular to floor. 4. Slowly bring legs out away from each other and then return to side by side. 5. Return to start position and repeat. Trainer's comments: |
 Oblique Crunch Oblique Crunch1. Start by placing your left foot over your right knee and place your hands behind your head. 2. Lift your shoulders up off the ground and twist so that your right elbows tries to touch your left knee. 3. Return to the starting position and repeat according to the required repetitions. 4. Repeat with the other side. Trainer's comments: |
 Burpees Burpees1. From a standing position, jump as high as possible and land down on your feet with your hands on the ground. 2. Kick your feet back. For a moment you will be in a push up position and jump back up again as fast as possible. 3. Repeat for the required repetitions Trainer's comments: |
 Situp Hold Situp Hold1. Start position: Lie back onto floor or bench with knees bent and hands behind head. Keep elbows back and out of sight. Head should be in a neutral position with a space between chin and chest. 2. Leading with the chin and chest towards the ceiling, contract the abdominal and raise shoulders off floor or bench. Now hold for prescribed number of seconds. 3. Return to start position. 4. Remember to keep head and back in a neutral position. Hyperextension or flexion of either may cause injury. Trainer's comments: |
 Prone Knee Tuck on ball Prone Knee Tuck on ball1. Start in a push up position with your feet on top of a stability ball. 2. Slowly bring your knees in towards your chest and then return to the starting position. 3. When your legs are extended make sure to keep your hips parallel with your body and do not let them sag towards the ground. Trainer's comments: |
 Scorpion Scorpion1. Get into a pushup position with your feet on a bench. 2. Raise your right knee towards your left shoulder as you rotate your hips up and to the left as far as you can. 3. Then reverse direction and rotate your hips up and to the right. Try to touch your right foot to the back of your left shoulder. You will not physically be able to do this. 4. That is one rep and continue for the prescribed repetitions and then repeat with the other leg. Trainer's comments: |
 Air Bike Crunches Air Bike Crunches1. Start by lying on your back with your hands behind your back and thighs bent 90 degrees at your hip. 2. Simultaneously curl your right shoulder and left knee up towards the center of your body until your elbow and knee touch. Return to the starting position and repeat with the other side. 3. Continuously repeat this pattern for the prescribed repetitions. Trainer's comments: |
1. Start by lying on your back with a stability ball held between your legs and your arms directly above your head. 2. Simultaneously raise your legs with the ball and your shoulders up towards the ceiling. 3. At the top grab the ball with your arms and return to the starting position with the ball in your hands. 4. Repeat this movement and transfer the ball back to your feet. 5. Repeat for the required repetitions. Trainer's comments: |
 Full Situp with Twist Full Situp with Twist1. Start position: Lie back onto floor or bench with knees bent and hands behind head. Keep elbows back and out of sight. Head should be in a neutral position with a space between chin and chest. 2. Leading with the chin and chest towards the ceiling, contract the abdominal and raise shoulders off floor or bench. As you come up twist one shoulder towards the opposite knee. 3. Return to start position and repeat with the other shoulder. 4. Remember to keep head and back in a neutral position. Hyperextension or flexion of either may cause injury. Trainer's comments: |
 Hip Thrusts Hip Thrusts1. Lie on your back with your legs bent 90 degrees at the hip. 2. Slowly lift your hips off the floor and towards the ceiling. 3. Lower your hips to the floor and repeat for the prescribed number of repetitions. Trainer's comments: |
 Pushup Superman w/ Alternating Arms Pushup Superman w/ Alternating ArmsStarting Position: Start the movement in a plank position. Holding that position raise your right arm and left leg off of the ground. Return to the starting position and repeat with the other arm and leg. Hold each lift for 1-2 seconds. Trainer's comments: |
 Straight Arm Pushup Hold Straight Arm Pushup HoldStarting Position: Start the movement in a pushup position. Extend your arms into a pushup. Hold that position for the prescribed number of seconds. Trainer's comments: |
 Flutter Kicks Flutter Kicks1) Lie back onto floor or bench with both knees bent and feet flat. Place hands at sides. 2) Contract abdominal muscles continuously to stabilize trunk (or tuck stomach in by drawing naval in towards spine). Lower back should be in a neutral position. 3) Start position: Straighten both legs so that they are perpendicular to floor. 4) Slowly lower one leg to approximately 45-90°. 5) Return to start position and repeat with other leg. Trainer's comments: |
 Bicycle Kicks Bicycle Kicks1. Lie on your back with your knees at chest level and your arms flat on the floor. 2. Alternate extending your legs by extending one leg out straight and as you bring it in extend the other leg out. 3. Continue to repeat this process like you are riding a bicycle until the required repetitions are completed. 4. Make sure you keep your back flat during the movement. If you are unable to keep your back flat then reduce the extension of your legs. Trainer's comments: |
 Bridge (Plank) on elbows Bridge (Plank) on elbows1. Start by lying face down on the ground. Place your elbows and forearms underneath your chest. 2. Prop yourself up to form a bridge using your toes and forearms. 3. Maintain a flat back and do not allow your hips to sag towards the ground. 4. Hold for the required time limit or until you can no longer maintain a flat bridge. Trainer's comments: |
 Double Leg Pressouts Double Leg Pressouts1. Start by lying on your back with your knees towards your chest and your arms flat on the ground. 2. Keeping your back flat throughout the movement kick your legs out and away until they are almost straight. 3. Bring your legs back in and repeat for the required number of repetitions. 4. If you are unable to keep your back flat on the floor throughout the movement shorten the distance that your legs extend until you get stronger. Trainer's comments: |
 Side Bridge Side BridgeStart on your side and press up with your right arm. Form a bridge with your arm extended and hold for the prescribed number of repetitions. Trainer's comments: |
 Plank Knee-ins Plank Knee-ins1. Start by getting on your hands and knees in a push-up position. 2. Keeping your abs tight and your trunk parallel bring one knee in towards your chest. 3. Return the foot back to the starting position and repeat with the other leg. Trainer's comments: |
 Abdominal Strengthening Abdominal Strengthening1. Lay on your back with knees bent. Place a towel in the small of your back. Keep your lower back pressed against the towel. 2. Tighten abdominal muscles and hold. In one continuous move, slowly straighten left leg, pause, and then bring it back to the starting position. Do the same with right leg. Let your heels slide across the floor. 3. Maintain tightened abdominals as you alternate legs. 4. Repeat for the prescribed number of repetitions. Trainer's comments: |
 Unilateral Leg Raise on balance disc Unilateral Leg Raise on balance disc1) Lie back onto floor on top of a balance disc with both knees bent and feet flat. Place hands at sides. 2) Contract abdominal muscles continuously to stabilize trunk (or tuck stomach in by drawing naval in towards spine). Lower back should be in a neutral position. 3) Start position: Straighten both legs so that they are perpendicular to floor. 4) Slowly lower one leg to approximately 45°. 5) Return to start position and repeat. 6) Remember to maintain stability in lower back throughout movement by keeping abdominal muscles contracted - DO NOT ARCH LOWER BACK. To increase intensity, lower legs past 45° without touching floor as long as trunk stability is maintained. Trainer's comments: |
 Side Plank Side Plank1. Lay on the ground on one side. Raise your body using one forearm and support it in this raised position for the required time. 2. Lower your body and repeat on the other side. 3. Remember to keep your head, neck and body in a straight line. Trainer's comments: |
 Supine Double Leg Raise Supine Double Leg Raise1. Start by lying on your back and a slight bend in your knees. 2. Raise your legs to a perpendicular position to the floor. This is your starting position. 3. Slowly lower your legs until you are no longer able to keep your abs tight and your low back on the floor. 4. Raise your legs back up to the starting position and repeat. 5. Only lower your legs as far as your abs have enough strength for. Trainer's comments: |
 isometric abdominal isometric abdominal1. Begin by lying on your back with your knees bent. 2. Hollow out your stomach by sucking in your abdominal muscles. 3. Tighten abdominal muscles in this position. 4. Hold for 3-5 seconds and repeat. Trainer's comments: |
 Elevated Prone Hip Extension Elevated Prone Hip Extension1. Start by placing your hands on the ground and your feet up on the wall. 2. Proceed to bring one knee in towards your chest and then kick your leg using your glute back onto the wall. 3. Repeat for the desired repetitions and then repeat with the other leg. |
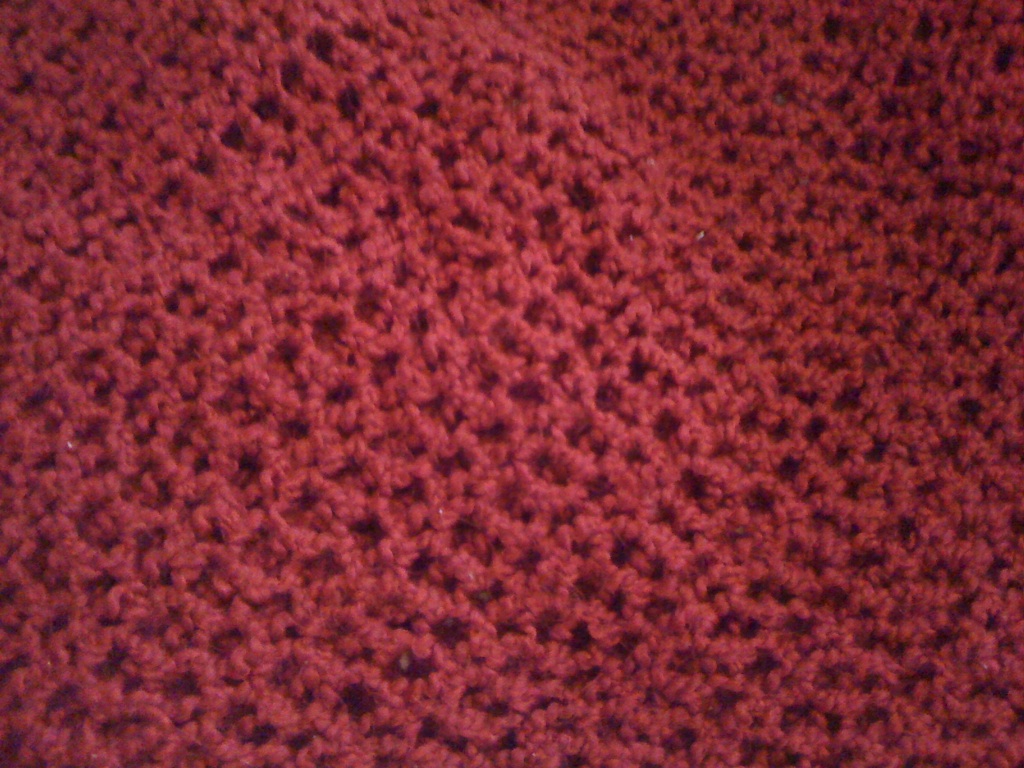
Crocheting
When I was 8 my aunt showed me how to crochet. Here is a king size red blanket i made. Crocheting is really simple and easy to do. The larger the needle, the shorter amount of time it will take to make something. I'm always happy to show you anytime or you can go to a craft store and pick up a book on how to crochet.

Drawing
I always loved to draw but haven't done much since having kids. We usually draw things on how we think they look like instead of looking at a picture and object and drawing it slowly examining all the angles and shades. Pick up a How To book on drawing to learn more tips and tricks! Here is a few drawings i did when i was a teenager.


Teaching Your Children
WHEN TEACHING KIDS YOU SHOULD BE CREATIVE! PICK A THEME AND USE THESE DIFFERENT TOOLS TO HELP THEM LEARN WHAT IT IS!
For instance: If you want to teach them about birds, write birds in the center of a paper and branch out things that apply to birds such as different types of birds, foods they eat, what their body looks like, sizes of birds, birds homes, origin of birds, colors of birds, ways birds help, etc. This will teach the children there are many types of birds, birds hatch from eggs, they have feathers, wings, tails, legs, eyes, and beaks. Birds live in nests, trees, houses, and cages. Birds eat seeds, insects, crumbs, berries and worms. Some birds eat fish and small animals. Some birds help us by eating insects.
Next, have a vocabulary list to teach them new words such as beak, bird feeder, bird watching, feathers, hatch, nest, perch, and wing.
Create a bulletin board that helps them with problem solving, counting, matching, etc but do it with bird pictures or nest!
Arts and Crafts: do an art or craft that has to deal with birds like feather painting, drawing a picture of a bird, dyeing eggs, birdseed collages and more!
Cooking: Make egg salad sandwiches or something birds like to eat like french bread!
Dramatic Play: Build a Birdhouse, bird nest, or other project!
Field Trips/Resource People: Visit the pet store, bird sanctuary, museum, zoo, veterinarians, wildlife and more!
Music: Sing a song that has to do with birds.
Group Time: Tell a story or play a game that has to do with birds
Large Muscle: Have children search for twigs to build a nest, try balancing an egg on a spoon, hide plastic eggs and have the children search for eggs!
Math: Have children count feathers!
Science: Make bird feeders, observe a nest or bird, etc.
Sensory: Have children play with feathers and sand, eggshells, sticks and twigs, worms, water, rubber ducks, birdseed , etc.
Social Studies: Learn to care for birds and how to attract them.
Stories: Read a story about birds

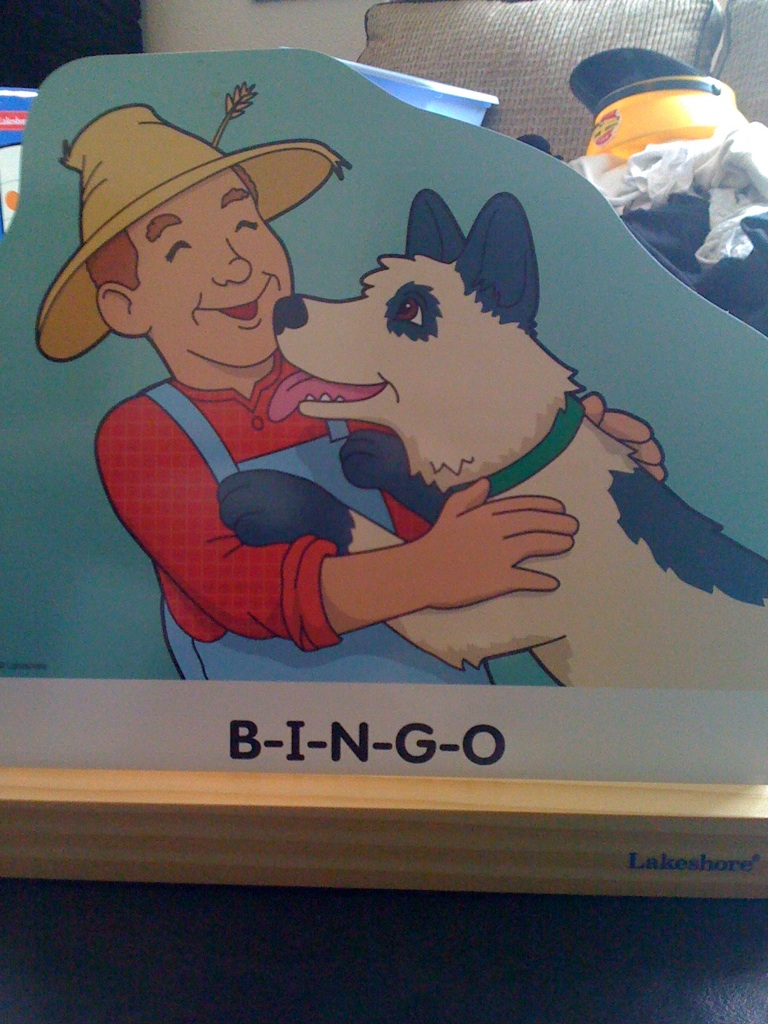
Here is my favorite Teaching Tool! The Circle Time Center teaches your little ones everything they need to know. The date, the day of the week, letters, rhymes, colors, shapes, weather, and counting! I got this from Lakeshore Learning.com

Disciplining Children
Kids do what they do because they've gotten away with it. Who is really in charge of your family? Is it you or your child? Today's parent's don't act like parents. They are so concerned about being their child's friend, not hurting their feelings, and want to make sure they are happy and successful. They smooth out all the bumps so the child never has to be uncomfortable or go out of their way. Why should they? They are use to you doing things for them. Mothers and fathers become servants of their children, rather than parents, who have the child's long term best in mind. They spend more time warning and reminding their children than they do training.
Your child's behavior has everything to do with you. If you allow your children to win, your child's smart enough to try it again next time. Everything your child does is for a reason. All children are attention getters. If your child cant get your attention in positive ways, he'll go after your attention in negative ways.
When a child does something they shouldn't use it as a training time and tell them why they are acting that way or why you said, "no." Only say it once then walk away.
Did you know that behavior is learned? And that children will model their behavior after the things they see you say and do? If you yell when you get angry, should it surprise you when your 4-year-old does it?
Don't ask for the behavior. We expect our children to misbehave so when we go somewhere public and ask them not to fight or cry your telling your children, "I expect you to misbehave, and you better not." Your actually teaching your kids to make trouble. Children misbehave around you because you expect them to, and the only way they can get your attention is by misbehaving.
Resume Writing
Do's of Resume Writing
- Do consider a bulleted style to make your resume as reader friendly as possible
- Do include as much contact information as possible-any information that would enable an employer to reach you during business hours.